
By Melissa Corkhill
01st April 2016
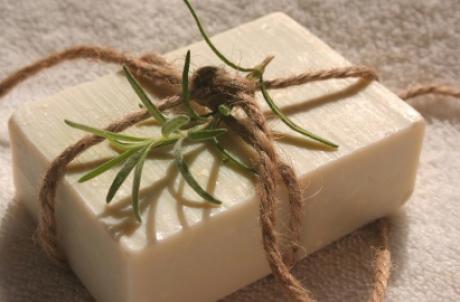
Little Colipalm Starters Recipe
Liquid: 120g Water (spring water, distilled water or filtered rain water)
64g Pure Sodium Hydroxide pearls (also called Caustic Soda/NAOH)
Base Oils: 140g Organic Coconut Oil (for lather)
112g Certified Sustainable Palm Oil (for a hard, stable, long lasting bar)
98g Olive Oil (ideally Pomace Oil or Extra Virgin) (for moisture/conditioning)
Nutrient Oil (at 2%): (optional) 10ml = such as castor oil, jojoba or avacado or extra virgin olive oil.
Essential Oil/s (at 3%): (optional) = up to 13ml for fragrance (but be guided by your sense of smell and use lesser quantities of stronger oils. However, never be tempted to go above 3% for Essential Oils – they can be surprisingly strong and in particular the citrus blends are known sensitizers).
Additionals: (optional) such as rolled oats/poppy seeds/dried calendula petals
MAKING SOAP
1. Before beginning arrange all your equipment and ingredients in front of you as it’s important to prepare well. Once you begin to stir it is too late to stop and fetch something you forgot….!
2. Line your mould (something that will take 500g – ideally a plastic take out dish or wooden box) with greaseproof paper.
3. Keeping the Sodium Hydroxide unopened weigh out the water into the glass jug and then place it away from the scales.
4. Next, (wearing protective black heavy duty gloves and goggles which you will keep on throughout) weigh out the Sodium Hydroxide into a clean pyrex jug. Be as precise as you can with your weighing… this is important.
5. Open the window (or even better, do it in the garden), take a deep breath and holding your breath, pour the sodium hydroxide into the water and stir with a stainless steel balloon whisk or spoon until it dissolves. Leave the room for a minute or two until the fumes have gone (or leave it outside – but well away from children or pets). This is now your lye.
6. Next measure out the solid oils (coconut and palm) on the scales and then put them on a low heat until they have melted.
7. Take off the heat and add the liquid olive oil to the pan and set aside.
8. Place a glass thermometer into both saucepans and check for temperature. You are looking for both pans to be between 95 and 125 degrees F. Ideally around 110F. The smaller the batch, the hotter it should be.
9. Using a basin of iced water (or hot water) you can help adjust temperatures. You are aiming ideally for both the lye and the oils to be within a few degrees of each other.
10. Once your optimum soap making temperature has been reached. Very carefully slowly pour the lye into the oil pan. Begin to stir the mixture with the balloon whisk to avoid splashing… it will soon begin to thicken and you can continue at a more brisk pace. Make sure your stirring is constant (do not speed up or slow down). Be sure to scrape around the edge of the pan after every few turns of the whisk so that the mixture is thoroughly incorporated.
11. TRACE is achieved when the soap mixture has become thick like custard and when the whisk is lifted a thin ribbon trail (the “worm”) of mixture dropping back into the pan rests on the surface of the mixture for a few seconds before sinking back in (just like cake making).
12. There is no way to tell how long it will take to bring your mixture to TRACE. But we do know Pomace Olive Oil traces much faster than Extra Virgin Olive Oil so if you’re using store cupboard ingredients do be aware you could be mixing a while longer!
13. When a light trace is achieved it is time to add your nutrient oil and any additives.
14. Essential Oils should be added last of all and stirred in with the baloon whisk only enough to disperse them throughout the soap mixture. Stirring too long can result in dis-colouration of the soap or uneven texture in the finished bar.
15. Pour the soap into the mould and use a silicone spatula to get all the mixture out – you don’t want to waste any – besides, it also helps the washing up process and your drains!
16. Some schools of thought insist the soap mould must now be covered and insulated with a towel or blanket for 18-24hrs. However, if the recipe ratios are correct and you have mixed it correctly the soap will continue to saponify and generate heat whether insulated or not – it’s all a big myth… I personally don’t incubate any of my soaps at all. Eitherway, the soap mixture will enter the ‘gel stage’ which sometimes can be seen with the soap hardening from the outside of the mould inwards.
17. Depending on the recipe, your hardened soap will be hard and ready to remove from the mould after anything between 6-24 hours later. Wear your gloves to be on the safe side, fresh soap is still very caustic and not ready to be used. If the soap feels too soft to cut then leave it in the mould for another day to harden. Once hard enough, cut the soap into the desired size bars you wish . Then leave on a tray and cover with greeseproof paper and leave to cure for a good 4 weeks when it will be ready to use… ideally pop it on top of a bookcase or in a cupboard out of direct sunlight – and once ready – always store in a room temperature place out of sunlight.
By EMMA HEATHCOTE – JAMES – Emma founded the Little Soap Company (littlesoapcompany.co.uk) which provides 100% pure, natural handmade soaps to local Waitrose, National trust and health food and farm stores as well as internet orders nationally. Little Soap School days offer one on one or small group luxury days in the workshop in South Worcestershire teaching you how to make your own soaps and natural lotions and potions.