By The Green Parent
07th June 2022
I wanted a ‘lazy craft’ using only use materials we had in our home, and something easy enough for a five and two year old. So I started rummaging around the house, and came across a flower press containing our little collected treasures from a walk we took earlier in the month.
A bit more searching and scouring, (this time in the kitchen) and I realised we had a pretty collection of glass jars and bottles. Then, inspiration hit me immediately. Fingers crossed my dried and pressed flowers would work, so off I went to create our craft area.
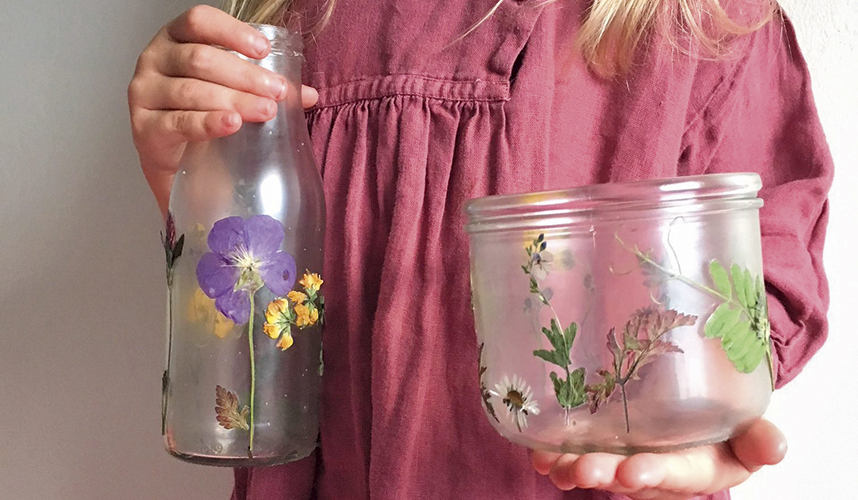
The good news is that the crafting experiment was a success! They are pretty, fragile looking, and almost seem like something you would buy from a handmade boutique. All you need is a few dried flowers, collected from the garden, then pressed for a day or two… (between book pages or with a flower press).
The kids got so excited about it as well, opening the pages of wax paper in the press like gifts under a tree, revealing the flowers from a walk we took weeks ago. Then they loved painting on the glue, pressing the flowers into where they wanted them, and then watching the items dry clear. Find more projects from Lara at babyccinokids.com
HOW TO MAKE:
MATERIALS:
- Decoupage glue, or we used school PVA glue
- Large paintbrush
- Glass jars, bottles, etc. with smooth sides
- Wax paper or newspaper (for keeping surfaces clean)
- Pressed flowers
- Scissors
- Tea-light (optional)
- Choose which flowers you want to use where, we chose five flowers for each child’s container
- Paint one thick layer of glue (or Mod-Podge) on the surface of the glass jar, avoiding the base. Clean up drips as soon as possible. However, the end result isn’t really affected by a few smears or drips.
- Carefully lay the flowers onto the glue, since they are quite fragile, much more so than leaves, for example. Also regarding the layout, we preferred to keep it simple and have the flowers ‘growing up’ from the base, but if you only have flower heads or petals that could create really pretty patterns too.
- Trim the extra stems, etc. just make sure you have all the flowers touching the jar and glue!
- Let it dry entirely (a few hours) … then do a second coat and let that dry, and enjoy!