
By The Green Parent
12th October 2020
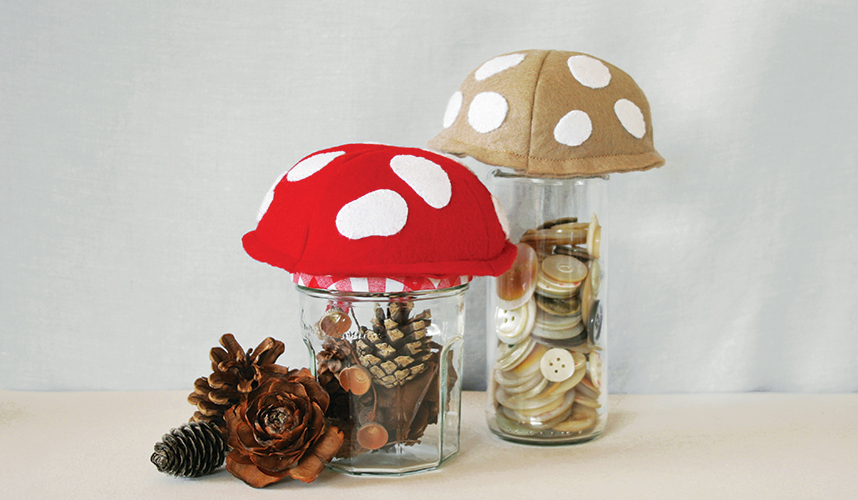
Toadstool jar tops are quick to whip-up either using a machine or sewing by hand and they are so simple to make this is a great project for beginner stitchers.
Supplies
- Red or tan felt
- White felt
- Coordinating thread
- White embroidery thread
- Sewing and embroidery needle
- Scissors
- Straight pins
- Biro
- Toy stuffing*
- 40cm length of ribbon roughly 1cm wide
- Hammer
- Flat head screw driver
Optional: Sewing machine
1. Print out the pattern. Our pattern fits a lid that is 8.5 centimetres in diameter. Print the pattern out larger or smaller depending on the size of your jar. Piece (B) should be four to six centimeters larger in diameter than the diameter of your jar lid.
2. Pin the shapes to the felt and trace around them with a biro. Cut four of the rounded triangular shape (A) for the cap and one circle piece (B) for the cap base in a matching colour (red or tan). Cut out spots for the toadstool cap in white felt.
3. Use a 5mm (1/4”) seam allowance and stitch the long curve of two triangular pieces (A) together starting 5mm away from the top point; repeat with the remaining two triangles. Stitch the two outer triangles together to form the cap. This can easily be done using a small running stitch by hand, or use a sewing machine to make a quicker job of it. (Pic 1)
4. Clip notches along the curve of each seam. (Pic 2)
5. Turn the cap right side out and stitch the spots on to the toadstool cap using embroidery thread and a simple running stitch or whip stitch. (Pic 3)
6. Punch two holes in the jam jar lid. Simply place the lid upside down on a firm yet somewhat pliable surface (such as a couple of magazines stacked on the floor or a wooden board) and hammer a flat edge screwdriver into the lid in two places. The holes should be centered and about one centimetre from the edge of the lid.
7. Centre the jar lid in the middle of the round piece of felt “B”. Mark the holes in the lid with a biro. Clip two small slits in the round piece of felt where you marked the holes. (Pic 4)
8. Pin felt circle B to the base of the toadstool cap; stitch around it leaving a gap for stuffing. (Pic 5)
9. Thread the ribbon through the two holes in the base of the cap then fill the cap with toy stuffing. Be careful not to stuff the cap too firmly, you don’t want the base rounded. (Pic 6)
10. Set the stuffed cap on the jar lid and make sure it sits flat. If the cap doesn’t sit flat push the stuffing further into the top of the cap with the rubber end of a pencil or remove a little stuffing, then sew up the gap.
11. Lastly, thread the ribbon from the stuffed cap through the jar lid, tie it tightly under the lid then trim the ends and screw your new toadstool top to the jar.
*Filler: We like to use wool roving or unbleached kapok. Wool roving is sheep wool that has been cleaned and carded but not yet spun into yarn or felted. Kapok is a very soft natural fiber from kapok (ceiba pentandra) trees. It was widely used for pillows, duvets and toy stuffing before synthetic materials largely replaced it.
MORE INSPIRATION
FIND Joan Gorman at ninimakes
DISCOVER All her Green Parent craft projects in our back issues here