You will need:
• Cardboard, ruler, pen and scissors
• Sewing machine (optional, but great for the professional touch) or a simple needle
• Cotton thread
• Cotton fabric in your choice of style
• Vilene, one sided dress making material
• Iron
• Bias binding
• Felt, buttons and scallop edged scissors (optional, for extra flair)
Method:
1. To begin with, you will need to place the back of your cotton fabric (the dull side) against the shiny side of the Vilene and iron until they are stuck together. Lay flat to set and repeat for each piece of fabric you would like to use.
2. As your fabric is cooling, use a ruler and measure out a triangle shape on a piece of cardboard using the ruler and pen. Take the scissors and cut out the shape.
3. Take your bias binding and measure how much of your wall you would like the bunting to span.
4. Once your cotton fabric is cool and set, it should be much more rigid thanks to the Vilene. Turn it over onto the Vilene side and, taking your triangular piece of cardboard, measure out as many pieces of bunting as you would like to fit across the bias binding and cut them out with the scissors Be sure to leave a couple of inches between each flag.
5. Once you have your fags cut out, you can now add some shapes with the felt and embellish with some buttons if you wish. Take a look on pinterest for a little inspiration. I prefer to add embellishments by hand, but dependent upon your skill level a sewing machine can be much quicker.
6. The final step is to attach your flags to the bias binding. Taking the iron again, double the bias binding over with the flaps pointing inward touching each other. The goal is to have smooth edges. Iron the bias binding flat.
7. Once the bias binding is ironed and cool, you can now use either a sewing machine or a needle and thread to attach the flags. Measure where you would like them to go before hand and affix with dressmaking pins, being sure to insert the flags into the fold of the bias binding. Close with a simple running stitch.
You can choose to fold over and stitch the edges of the bias binding down once finished, or make loops for hanging, but it tends not to fray so this is not essential. You should now have rigid, non-fraying, seamless bunting – possibly even with some pretty embellishments!
Well done!
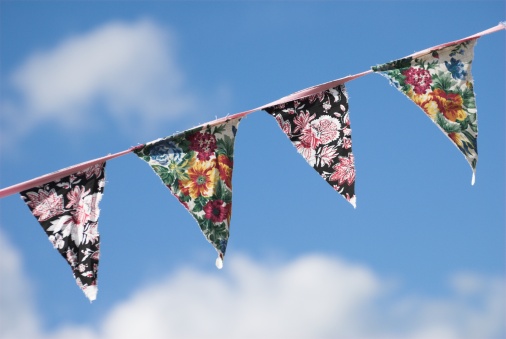
I love bunting. Home made bunting adds real personality to the home and can be a really nice touch at family gatherings and celebrations. There’s nothing quite like it and the variety of bunting out there just shows that there’s a style for everybody to get into. Perhaps the man of the house is less interested in these decorative pieces, but nobody can really argue that a good strip of bunting isn’t at least a great (and cheap) way to brighten up a blank wall. For the sake of clarity, this is a how to guide for flag shaped bunting.